How to cast Windows 10 to TV without Miracast in 2023
If you want to cast Windows 10 to TV, you’re in the right place. Casting is an essential feature that allows users to watch videos and movies and display pictures from their tiny screen to a big screen. Squinting over your small screen isn’t ideal, as it might lead to eye problems and discomfort.
However, it might be frustrating if you need to know the right tools to use while casting or the best steps to follow to make the process a success.
While Miracast is a good option for casting, it’s not the only one. You can use other tools like Chromecast and FlashGet Cast to cast laptop screen to TV. Miracast may also have disadvantages, such as latency and resolution issues.
This piece will help you understand how to cast Windows 10 to TV without Miracast in 2023. We’ll examine the tools available, how to use them, and their advantages.
How can you cast Windows 10 to TV?
Casting Windows screen to TV might be daunting if you need to know the right things or steps to implement. This can be through a cable, wireless casting, streaming adapter, or screen mirroring App. While it requires you to have the proper devices and tools, users must be keen to avoid making mistakes. Here’s how you can complete the process without a hassle:
Cast Windows 10 to TV via cable
If you’ve been asking “how to cast Windows 10 to TV,” then you should know that using a cable is probably one of the easiest ways to transfer information to your TV for better visibility and audio connection. Although regarded as a traditional method, it’s still prevalent in the modern age, making it a casting favorite.
To kickstart the process, you’ll need the right size cable to ensure it fits the distance you want to cast from. You must also ensure the TV and PC have a casting port to make the process successful.
Here are some of the benefits of using a cable to cast content to your TV:
- Using a cable provides versatility as it works with numerous types of TVs.
- The cables have a lower latency level compared to wireless options.
- It provides an excellent visual quality.
- It has a steady and reliable connection throughout the process.
It facilitates data security by transmitting your information through a cable, reducing hacking concerns.
Using a cable to cast content can be a great idea. Follow these steps to cast your content to TV using a cable successfully:
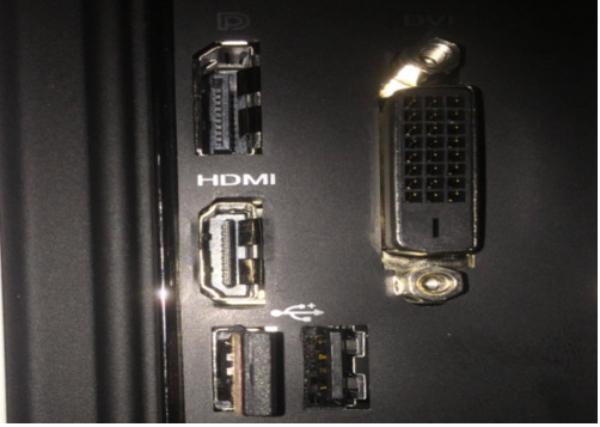


First, ensure you connect the HDMI cable to the PC, and you can find it at the back of your CPU to complete the process.
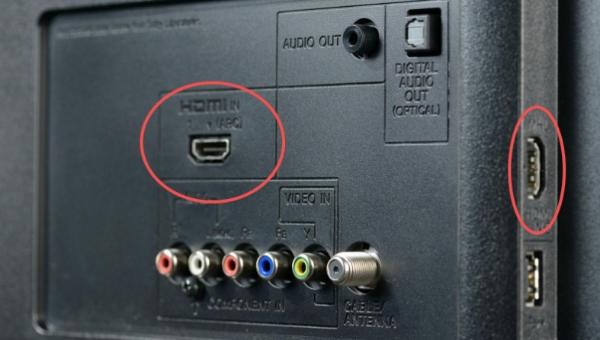


Connect the HDMI cable to your TV at the right port to avoid inconveniences using the same process as the first one.
Use the TV remote to select the HDMI source. Some TVs may not be able to detect the cable connection automatically. Use the labels on your HDMI ports to help you choose the right HDMI port.
Tap the Windows icon at the bottom left of your PC home screen and type Settings, then Go to Display.
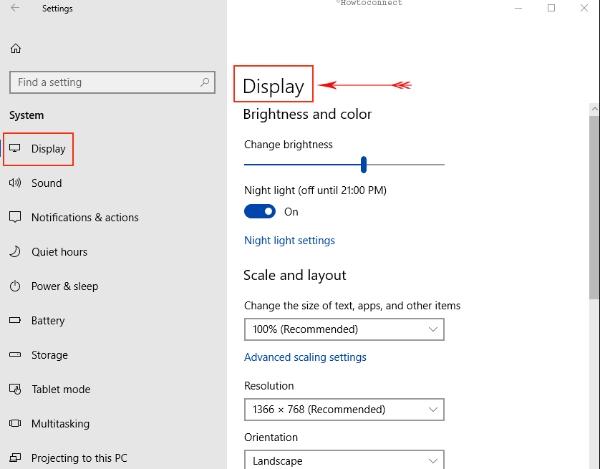


The last step involves navigating through the TV settings as you pick on the correct HDMI slot you want to be accessed. Once that is complete, you’ll have your PC content on your TV soon.


Cast Windows 10 to TV wirelessly
A wireless connection is another great way to cast to TV Windows 10. This process doesn’t require you to use cables and their measurements. While there are numerous ways, such as Miracast and Chromecast, you can use to complete the wireless process; each comes with its own set of rules and steps.
This section will discuss how to cast Windows 10 to TV using Chromecast. But before looking at the steps, let’s check out the benefits of using a wireless connection to cast content to your TV:
- It has an excellent multitasking option that allows you to use the laptop screen while casting content on TV.
- Ensures the content you cast on your TV has better quality than the original version.
- Wireless casting capabilities allow you to use numerous devices that support the process.
- You can wirelessly share your screen with others with a few simple clicks.
- It’s convenient as it doesn’t require cables to make the process successful.
Cast to TV from Windows 10 via streaming adapter
Streaming adaptors are great ways to cast content from your laptop screen to the big screen. With these devices, you can quickly move data and audio without using cables. Although streaming adaptors are pricier than other options, they can be excellent for those who want a device to last long.
While Chromecast and Miracast are two of the most popular streaming adapters, we’ll focus on Chromecast. It has many benefits for users, including the following:
- It has a low latency level with fast connection speed.
- Allows casting of content from numerous devices.
- It offers various device compatibility, such as Android and iOS devices.
- Has low power consumption levels compared to other streaming devices
You must connect the Chromecast device to your TV using a USB cable before we continue with the next steps.
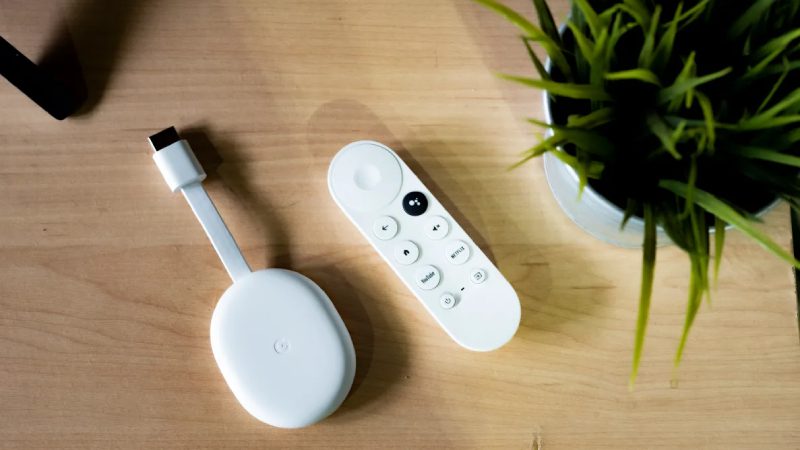


Here are the next steps:
- Download the Google Chrome browser on your PC.
- Ensure your TV and Windows 10 PC are connected to the same wireless network.
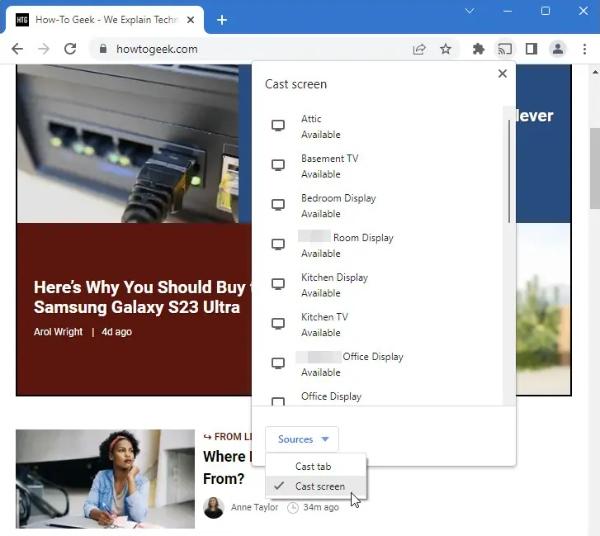
- On your Google Chrome, tap the 3-dot symbol at the top right corner. Click on the Cast option in the pop-up that appears.
- You’ll see a list of Chromecast-enabled devices.
- Scroll down to sources and choose Cast screen. Then select the device you wish to mirror your desktop to.
- Your PC screen mirroring on the TV automatically once the connection is complete.
Cast to TV from Windows 10 via FlashGet Cast
One of the best ways to project content from your Windows device to a TV screen is through a reliable third-party casting App like FlashGet Cast and Mirroring360.
Failure to select the right third-party apps can lead to inconveniences you may not want to deal with. To help you with your selection, we’ve chosen the FlashGet Cast.
What is FlashGet Cast?
FlashGet Cast is a life-changing third-party casting App that has incredible features to help stream your PC content on your TV in a few straightforward clicks. It gives users control over all devices used, which is excellent for business users for better productivity during meetings, presentations, and remote casting.
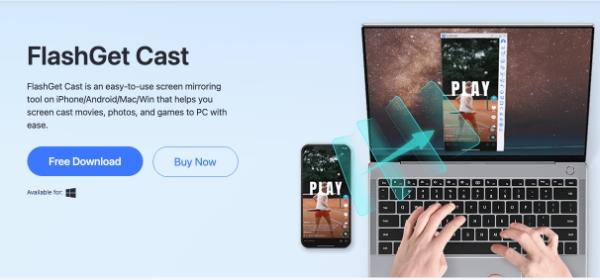


It’s also an excellent tool for streamers and movie enthusiasts, as they can enjoy a film on a larger screen without breaking the bank. The best part is that you can download and install it for free, making it user convenient. Here’s a breakdown of how you can set FlashGet Cast to work for you:
- The first thing you’ll need to do is head over to the browser on the TV. From there, launch cast.flashget.com to secure the FlashGet web version.
- The next step is securing and installing the FlashGet Cast App on your PC. The best part is that you can download it for free from their website.
- Now that you have the FlashGet Cast App, the last part will be to scan the QR code provided to connect the two devices. Once you’ve implemented the QR code scan, you’ll have your PC content on your TV screen.
What do you need before casting to TV from Windows 10?
You must know a few essential things before casting content from PC to TV. Here is a conclusive list that will help you identify the best casting practices and avoid digital mistakes that might cost you time and money to fix.
- You need to identify the right apps that support screen mirroring or casting, such as FlashGet Cast, which supports Windows 10.
- Knowing the methods you can implement to ensure it covers both smart and non-smart TV is also essential.
- You also need to ensure that you have a stable WiFi connection that’s identical between the two devices to facilitate the casting process.
- Using cables, you must identify whether the TV and PC have the correct casting ports.
- Check or update your PC’s software to avoid inconveniences while casting.
If you’re implementing techniques like Apple TV, check that the Bluetooth connection works while casting.
What can you get from FlashGet Cast?
Numerous advantages can be attributed to FlashGet Cast. It has essential features and much more that every user should check out. To know more about the unique features it offers, here’s a breakdown:
1. Smart Display Method
While most casting tools only have one casting option each, FlashGet Cast provides a platform for wireless and USB connection systems. Moreover, it enables users to use audio while casting, which is a bonus.
2. Remote Control
FlashGet Cast provides users exclusive control over that casting process as they can use it remotely. While it’s also compatible with numerous devices, it guarantees you fun and access to Apps on your device without the help of emulators.
3. No Time Limit
FlashGet doesn’t put time restrictions on its users on when to stop casting. It grants you the ultimate decision to cast as long as you’d wish to ensure you have the best experience with the app. This is a great feature that many users worldwide appreciate.
4. Multi-Support System
FlashGet Cast also has an incredible feature that allows users to select up to 5 devices while casting. The best part is that you can share all these devices without worrying about the device or the system becoming faulty.
5. Versatile Platform
Finally, FlashGet Cast is a versatile platform that adapts to different operating systems and supports numerous languages for ease of use. This ensures you won’t have any restrictions when using the app, regardless of location.
Conclusion
An excellent casting process requires a credible and reliable screen mirroring app, adapter, or cable to make the process seamless. FlashGet Cast is an awesome third-party app that lets you transfer content from your PC to your TV with a few simple clicks. So try it today for a great casting experience.

Comments